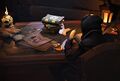
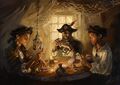
The Hoarder's Hunt
The Hoarder's Hunt is the second Mystery in Sea of Thieves. It began on May 11th, 2023 and ended on June 22nd, 2023.
Over the course of the Mystery, a series of four stages to be set off by the mysterious "H." will involve a Puzzle and Voyage each; all Puzzle stages must be completed for a chance at real-world prizes and in-game rewards.
Styled around the idea of an old-fashioned treasure hunt, this mystery is said to be the "ultimate treasure hunt" to bring the community a race to find the penultimate treasure, one of the most valuable in Sea of Thieves history to date, a bespoke Gold Hoarder skull fashioned from actual gold.
Check out the Official Mystery page here.
| |
|---|
How it works

The mystery consists of four series of Puzzles with clues found on the Official Sea of Thieves website and other locations online. Solve a Puzzle and enter the correct answer on the website to be able to claim a special Voyage from Larinna in-game.
The Voyage will lead to more clues in Sea of Thieves leading to a key that unlocks special chests held by the Gold Hoarders.
A new Puzzle and accompanying Voyage will be released at regular weekly intervals. A countdown to each Puzzle stage will be displayed on the Official Sea of Thieves website. Each Puzzle stage must be tackled in order. The Hoarder's Hunt will only be over when all Puzzles are solved, all Voyages completed, and the chests unlocked.
Prizes
Physical prizes
Real-world prizes are available to the first players to complete the Hoarder's Hunt.
Note: In the event of a winning crew, the player proposes the winning Voyage will be eligible to claim.
| Prizes | ||
|---|---|---|

|
Grand Prize
One unique replica Gold Hoarder skull with detachable ring of keys. | |

|
Runner-up Prizes
10 replica silver keys as reminds of those sought in The Hoarder's Hunt. | |

|
Third Place Prizes
100 replica golden Reaper's Mark medallions | |
In-game rewards
Players who don't qualify for the physical prizes have an opportunity to earn in-game Titles, Trinkets, and gold rewards.
Titles
| Titles | ||
|---|---|---|
| Image | Title | Description & Requirements |
 | Silver Hoarder | "This title shows you've earned your spurs when it comes to solving riddles!" Complete The Hunt for the Plated Silver Key Voyage from Stage 1 of The Hoarder's Hunt. Time-limited |
 | Golden Meddler | "You've solved all the clues and riddles to master this mischievous mystery, so wear this Title with pride!" Complete all four stages of The Hoarder's Hunt. Time-limited |
Trinkets & Sails
| Image | Item | Requirements |
|---|---|---|
 |
Bullion Crown Trinket | Complete The Hunt for the Sterling Silver Key Voyage. |
 |
Gold Hoarder Skull Trinket | Complete The Hunt for the Hoarder's Golden Key Voyage. |
 |
Defaced Reaper's Mark Sails | Complete all four stages of The Hoarder's Hunt Mystery. |
Commendations
| Commendations | |||
|---|---|---|---|
| Image | Commendation | Requirements | Rewards |
| Hoarder's Gold Champion | Lay bare the Enigma, find every clue and seek every key. (4) Time-limited | +50 |
Bullion Crowns treasure

In addition, Bullion Crowns will appear washed up across the Sea of Thieves. These Crowns can be sold to the Gold Hoarders for a "handsome payoff" of roughly 10,000 ![]() .
.
List of Stages
There are be four stages in total, each starting off with a letter from the mysterious "H.". A stage will run for a week and consists of a Puzzle and a Voyage.
Stage 1: Skin of Gold
Puzzle and clues
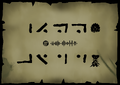
H's letter for Stage 1: Skin of Gold is as follows:
I trust you’ve seen my rules are SHAPED for Hoarders at their heart.
Just DON’T use COMMON PIRATES in your stead, and we can start!
First think of health and what you need to keep you fighting fit.
And FOODS that help survive both shot from gun and cutlass hit.
But there’s a DARK side to what we eat when time and life collude.
Old it becomes and rotten too, with scent of death imbued.
You must check in all the TIME. What if it’s now no good?
Be it PIG in PEN or FRUIT that’s stored in tuneless DRUMS of wood.
PICTURES paint a thousand WORDS – or so some artists say.
You must seek to LINK the two. Now hurry on your way!

Puzzle 1: Skin of Gold.

Sea of Thieves' Instagram story shows an image of banana bruising artwork depicting the Gold Hoarder. The same banana was posted by banana bruising artist banana_bruiser on Instagram. A sped-up video posted to their account shows the artwork being created. Throughout the process, a number of pigpen symbols are bruised into the banana.
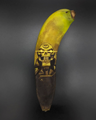
Sea of Thieves' Instagram story.

Putting the pigpen symbols though a pigpen cipher decoder gives "
BITLYSOTFRUIT" which can be used as bit.ly link bit.ly/sotfruit which redirects to a OneDrive folder named For Hoarders' Eyes Only which contains five images. Each image shows a different fruit each with different rotations, three more pigpen symbols and a Spotify Code.

Fruit Crate from #TriviaTuesday.
Banana
Coconut
Pineapple
Mango

Pomegranate


The Spotify Codes link to the Sea of Thieves page on Spotify. The music videos of six specific songs by Sea of Thieves each contain a single frame showing a different letter. When put together, the letters from all five songs make the word "
BOUNTY".
- Fated Enemies - B
- The Golden Voyage - O
- Gold Hoarder - U
- Shores of Gold - N
- Shroudbroken - T
- Across The Waves - Y
Sea of Thieves' Twitter post shows a pirate with the scorecard emote with the word "RipeGreenChive" on the ships crest, which is an anagram for Vigenere Cipher. Plugging in the Fruit code into the Vigenere Cipher with the word "Bounty" as the keyword reveals
ZEROUTCFOURFIVET. Replacing the words representing numbers for their digits reveals the code for Puzzle 1: 0UTC45T
Voyage
For details about the Voyage for Stage 1, see The Hunt for the Plated Silver Key.

Voyage 1: The Hunt for the Plated Silver Key.

Stage 2: A Feathered Fortune
Puzzle and clues
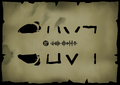
H's letter for Stage 2: A Feathered Fortune is as follows:
Before I sinned, I’d sit in the TAVERN and sing shanties.
I’d eat BANANAS and watch the gulls float upon the breeze.
Then things changed, the Hoarder’s pet MACAW became my vengeful bane!
Ever since, fear’s driven me to spy these beasts through windowpane.
Their scratching claws, their pecking beaks, I cannot stand these BIRDS!
But understand that secrets lie within their chosen WORDS.
Wise it may be to spy through glass, to view a PARROT’s perch,
And listen out for CLUES that may well help you on your search.


Puzzle 2: A Feathered Fortune.

Sea of Thieves' YouTube Livestream shows two colorful parrots speaking a series of random words and walking around the tavern. One day later, the video was updated to have a transcript to show what the parrots are saying.
The words spoken are:
- Washed
- Frost
- Robot
- Misfits
- Shady
- Goat
- Rocked
- Skull
- Lives
- Handy
- Chest
- Dawn
- Turkey
- Diet
- Parrot
- Chickens
- Locker
- Cannonball
What3Words:
At around the 14-minute mark of the video, a banana comes into the frame with a Pigpen code. The code translates to WhatThreeWords, referencing what3words.com, a website which takes three different words and translates them into a real-world locations.
Google Maps:
The video description also had a link to Google Maps disguised as a Sea of thieves link:
- "For anything else, go to: https://aka.ms/Sea_Of_Thieves"
The combination, 'turkey.goat.lives', on what3words leads to Cutty Sark, a visitor attraction and historic sailing ship near Blackheath, London. The Cutty Sark is the last surviving British tea clipper and is now a museum.
While viewing Cutty Sark in Google Maps and browsing the "Street View/360°" tab under "Photos", an uploaded 360° panorama can be found by the user "H “For Gold Hoarders Only”". In this panorama a parrot can be seen sitting on a sign with the Gold Hoarder's Bullion Crown coin and a pigpen code written around its outer edge.
The pigpen code translates to a bit.ly link bit.ly/sotfeathered which redirects to a new OneDrive folder named For Hoarders' Eyes Only.
Other worthwhile sights in this panorama are a goat and turkey standing together, referencing the what3words code that lead to Cutty Sark.
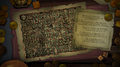
The link takes them to a OneDrive with an image of a parchment with eight lines of symbols that loosely resemble bird footprints. There is a bounding box that highlights the last line on the parchment.
The first seven lines translate to the lyrics for "We Shall Sail Together" spelled out phonetically. Using the phonetic translation of the lyrics, a legend can be created and used to decode the phrase on line eight: ɛksbəʊks waɪə mɑːks ð spəʊt which translates to "Xbox Wire Marks the Spot."
Pigpen parchment.

Among the Xbox Wire article for The Hoarder's Hunt are a number of promotional images, most of which have been used in the past for various purposes. One image in particular, of a pirate in a ship's crow's nest, has been edited with an added Macaw parrot and a small hidden X Mark that must be found in order to solve Stage 2.
The best solution to finding the small X Mark is to compare the differences between the version with the Macaw to the original promotional image. Once the X Mark is found, using a color picker tool on the blue coloured X to find the exact hex colour code for that shade of blue.
The resulting hex colour code will be 2faced, which is the final solution for the puzzle that will unlock the Voyage for Stage 2 if entered into the Mystery's website.
Voyage
For details about the Voyage for Stage 2, see The Hunt for the Argent Silver Key.

Voyage 2: The Hunt for the Argent Silver Key.

Stage 3: Portrait of Plunder
Puzzle and clues
H's letter for Stage 3: Portrait of Plunder is as follows:
I see you're using others in my enigmatic quest.
I warn you Hoarders that about my rules I do not jest.
As when playing CARD games, keep our secrets close to your chest.
Like I have done personally, you must your time invest
Don't SPY huge tornado, but smallest cloud up in the sky.
The devil and answers lie in detail - and so do I...
Swear your HEARTS to my CLUB and so you can find my hoard!
Ready your SPADES to uncover your DIAMOND like reward.

Puzzle 3: Portrait of Plunder.

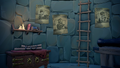
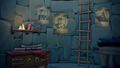
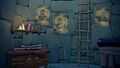
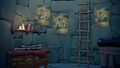
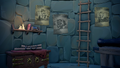
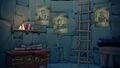
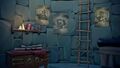
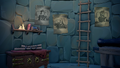
The first set of portraits were from images depicting the same room but with only varying hung portraits of Gold Hoarders; These were posted through social media and repurposed bit.ly and other links from previous stages.
The second set of portraits appeared in the background of "The Hoarder's Hunt Update One" Official Sea of Thieves video. Each video sharing platform had different portraits in the background at roughly 1:24 and 2:00 timestamps.
- Some portraits have distinct black line markings, sometimes with an included dot.
- Portraits are of Gold Hoarders NPCS found in-game (with the exception of two representatives):
- The NPCs are: Rathbone The Gold Hoarder (company founder), Humphrey the Hoarder from Sanctuary Outpost, Hugh the Hoarder from Port Merrick, Herbert the Hoarder from Ancient Spire Outpost, Henry the Hoarder from Galleon's Grave Outpost, Horace the Hoarder from Dagger Tooth Outpost.
- Also included is one unknown Gold Hoarder NPC who is only seen in 3D model concept art.
- NPCs NOT included are: Harry the Hoarder (Plunder Outpost) and Hyde the Hoarder (Morrow's Peak Outpost).
- While the "bit.ly/sotturkeygoatlives" OneDrive link is newer and presented differently, it is believed to be legitimate.
- Additional portraits and clues:
- On May 26, 2023 five more images were shared across social media platforms: Discord, Twitter, YouTube, Instagram, Facebook, and Xbox Club.
- On May 27, 2023 the "bit.ly/sotfruit" OneDrive image was updated with additional clues pointing to the code being in pig pen. The new image filename is "YouDisappointMe.png".
- On May 29, 2023 Community Manager Dalagonash on Discord updated their status to "Use our GIPHY", leading to the discovery that the profile banner on Sea of Thieves Official GIPHY account had an additional set of portraits.
"bit.ly/sotfruit" OneDrive (Recycled link from Stage 1)

Updated "bit.ly/sotfruit" OneDrive "YouDisappointMe.png" (May 27, 2023)

"bit.ly/sotfeathered" OneDrive (Recycled link from Stage 2)
"bit.ly/sotturkeygoatlives" OneDrive (Newer bit.ly link)
Facebook (Shared May 26, 2023)
YouTube (Shared May 26, 2023)
SoT Discord (Shared May 26, 2023)
SoT Instagram (Shared May 26, 2023)
SoT Twitter (Shared May 26, 2023)
SoT Xbox Club (Shared May 26, 2023)

GIPHY profile banner

Facebook (1/2)

Facebook (2/2)

Instagram (1/2)

Instagram (2/2)

Twitter (1/2)

Twitter (2/2)

YouTube (1/2)

YouTube(2/2)


On May 29th, around 3pm UTC, the official Sea of Thieves Instagram account posted a story sharing a video of Sea of Thieves Zoom Art with the caption “SO MANY DETAILS 👀.” The story linked to the original video posted by Andhi Pikapi(aka onepikapi), a digital artist specializing in Zoom Art.
One of the small details hidden within the Zoom Art, is a peculiar blue parrot sitting on a skull and cannonballs.
This artwork was dismissed at first, and was even shared a second time and still dismissed. Finally the Sea of Thieves Instagram shared a screenshot image of the blue parrot resting on the skull and cannonballs with the added "thinking" emoji (🤔) beside them, hinting to pay attention to these specific elements.
This eventually prompted a change of direction in community focus away from bit.ly links to looking at Twitter instead, leading to the discovery of several Twitter accounts. (see next clue for info)
- Efforts originally were aiming to connect the Gold Hoarder portrait codes with bit.ly links.
- Related bit.ly links were discovered much earlier and appeared to point to official OneDrive folder, however these folders were empty.

The final post which steered attention to Twitter.

The account is followed by several other accounts; the usernames use recurring parrot/portrait words:
- "Washed Robot" (twitter.com/WashedRobot)
- "Tod Cod" (twitter.com/frost_locker)
- "Rocked Diet" (twitter.com/rockeddiet)
All of these accounts had only one post in their timeline: an image of pirates playing cards.
Scene of pirates playing cards.

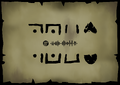
The puzzle:
The contents of the image's scene offered several things to solve and put together:
- "HEARTLESS":
- The suits and numbers on each card seen in the image are used to create the word
HEARTLESS. To do this, take note of the number and suit to each card. Each number associates with the letter in the card's suit.
For example: 1 of "H"earts isHor 5 of spad"E"s =E
- The suits and numbers on each card seen in the image are used to create the word
- Website You are a pirate puppet dot com:
- Washed Robot's microchip banner image with binary code for the letters
U(You) andR(are) - Rocket Diet's profile picture had a road sign for "Apteria" which is an anagram for
a pirate - Skull Cannonball's bio is, “One dog. Perhaps another. Together, you will obey my command.” Going with the theme of puppets in The Hoarder’s Hunt Mystery, you could translate this riddle to the word
puppet. - Tom Cod's name is an anagram for
dot com
- Washed Robot's microchip banner image with binary code for the letters
- Solution: Together these lead to the next step of Stage 3: https://www.youareapiratepuppet.com/heartless
- Roman numerals (17):
- In addition to the website clue, the image contained Roman numerals carved into the playing card table. Combining all four Roman numerals in order from left to right will return XVII or 17.
Other notes:
- The "Tom Cod" account has an earlier tweet from May 17, 2023 which is simply, "Miaow".
- The Twitter accounts were assumed to be fake at first due to the accounts only having each other as followers, as well as their unusual account profile pictures and banners. This was rectified later when the official Sea of Thieves' and official Rare Ltd Twitter accounts began following the accounts.
The homepage of "youareapiratepuppet.com" reveals a picture of playing cards face down on a table.
- On the card table there is tally marks counting to
6scratched into the table. - The number of cards match the number of letters in
HEARTLESS. - Despite the card backs being the same at first glance, each card has slight differences from one to the other.

Adding
HEARTLESS from the image of the pirates playing cards to the end of the youareapiratepuppet.com URL takes you to a page featuring two images, a map and a riddle. The map made its appearance in the ‘A Message from H’ video in Puzzle 2.
- The map is split into hand drawn, asymmetrical coordinate segments.
- The riddle reads as follows:
You Gold Hoarders are TURNCOATS!
Do not alter this game to become a deadly SPAT!
YOU must abide by my rules.
Stop enlisting the aid of those on galleons, sloops, and BRIGS
Who marvel at Ancient RUNES and their various USES
Who feast on COCONUTS before facing the FURY of the Devil’s Roar.
I see your CRUEL disobedience as you recruit these pirates.
As they DASH everywhere as fast as FATE will allow.
As they DIG up those precious keys you crave!
For you, they push past trees and struggle through FERNS.
For you, they weather the STORM yet they do not CRY!
Their strength to your weakness plants the SEED of doubt in my mind.
My rules have been plain and BASIC
Yet I see that you struggle to stay TRUE to them
As such, I may seek to alter the target of my INTENT...
Rearranging the letters from the capitalized words in each paragraph will reveal a phrase used to gather coordinates from the map. Shuffling the rest of the capitalized words around will result in the following phrase and coordinates:
- TURNCOATS SPAT YOU -> SANCTUARY OUTPOST -> B0
- BRIGS RUNES USES COCONUTS FURY -> YOUR SUCCESS BRINGS US FORTUNE -> 7R
- CRUEL DASH FATE DIG -> DISGRACED HATEFUL -> 1S
- FERN STORMS CRY SEED -> MERCYS END FORTRESS -> SG
- BASIC TRUE INTENT -> ANCIENT TRIBUTES -> J5
Putting all of the coordinates together form the code B07R1SSGJ5 which happens to be the ASIN (Amazon Standard Identification Number) for the Sea of Thieves Origins comic, Sea of Thieves Origins 1: The Price of Gold.
Note: Recurring once again is the number 17 found in a coordinate space on the far right-hand edge alongside two inter-locked Gold Hoarder keys.
- A 34MB high definition PNG of the map can be found on an [high definition official OneDrive here].
- The OneDrive Map was updated once after having been discovered. This was to correct mislabeled coordinates from the
BRto the correct7R.
The written riddle.
The map and riddle together.


The story told in Sea of Thieves Origins 1: The Price of Gold features the story of a young Humphrey the Hoarder, detailing why he sailed to the Sea of Thieves and how be became a Gold Hoarder.
- On page 17 in the 6th panel, the 17th word is
GRUDGE. - Using "Grudge" as a subpage at the earlier website leads to youareapiratepuppet.com/grudge
- On this page is a parchment with a drawn Gold Hoarders key logo and in the top left corner is the codeword
3GDURG("GRUDGE" backwards with 3 substituting the letter E)

Voyage
For details about the Voyage for Stage 3, see The Hunt for the Sterling Silver Key.

Voyage 3: The Hunt for the Sterling Silver Key.

Stage 4: The Crowning Glory
Puzzle and clues
H's letter for Stage 4: The Crowning Glory is as follows:
You have dared to meddle in what WAS my exclusive test.
So, get ready for the painful proof of why I am obsessed.
Join me on a JOURNEY of such dread that it will chill your heart.
You’ll wish you’d never taken that Hoarders Voyage for a start…
Across the entire Sea of Thieves – on land and sea and sky,
I’ll lead you on a chase and your expectations I’ll defy.
You’ve got a chest and opened it and found another chest.
But this is it, I’ve saved for last what’s ultimately best.

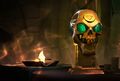
Puzzle 4: The Crowning Glory.

The first was just an image of a unique chest never seen before.
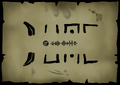
The second tweet was another image with a piece of parchment containing the words “Find me…”, four triangles pointing in different directions, and some Pigpen symbols. Decoding the Pigpen symbols as is will reveal the letters, “GMQHRDKK.”
All four of the previous Accounts, revealed to be owned by "H", have posted new clues:
- The post by @skullcannonball contained the following image with a riddle and one triangle pointing up.
- The post by @frost_locker contained two images. One of the images includes constellations from the Sea of Thieves on a parchment with the directions N, W, E, and S. However, H has swapped West and East with each other. The other image contains directions left by H. Again, note the one triangle pointing down.
- The post by @WashedRobot contained two images. One image has a riddle, and the other looks like a Word Search puzzle. The image with the riddle has one triangle on it pointing left.
- The post by @rockeddiet contains another parchment with a cryptic story and one triangle pointing right.
Also, Each of the four accounts has a link to a map Piece:
- @skullcannonball’s bio linked to youareapiratepuppet.com/square1
- @rockeddiet’s bio linked to youareapiratepuppet.com/square2
- @frost_locker’s bio linked to youareapiratepuppet.com/square3
- WashedRobot’s bio linked to youareapiratepuppet.com/foursquare
The four map pieces give a clue to using the Four Square Cipher. Using the Cipher along with solving three of the puzzles, leaving WashedRobot's puzzle to be solved as a word search, gives you these clue words:
- @skullcannonball’s Puzzle -
MONARCH - @rockeddiet’s Puzzle -
EAGLE - @frost_locker’s Puzzle -
SNAKES - WashedRobot’s Puzzle -
SUN
"We swore to never take his gold He claimed my vow was lies!
And I’d account for EVERY coin
You too… to claim my prize!"
A few more tweets were posted by "H" during the times the community was unable to progress:
- On June 9th, @HSeesAll made a second tweet. This post was a Quote Tweet that contained the four other H accounts, @WashedRobot, @skullcannonball, @frost_locker, and @rockeddiet, another parchment with another riddle, and the original tweet from the official Sea of Thieves account with the image of the constellation chest. The riddle on the parchment talks about distractions and reiterates everything we need to solve the puzzle you can find here, referring to the image of the chest and the clues from the four Twitter accounts.
- On June 13th, @HSeesAll made a third tweet. This post only contained a parchment with another riddle on it. The parchment reiterates that we need to find a word in the Word Search to continue solving the puzzle. It also states that we need to find the connection between the symbols, map, and everything on the note ‘H’ wrote the riddle on.
Each line from both H's first and third notes start with the same letter, which are Cardinal Directions, and also have the same number of words.
- First sentence = eight words
- Second sentence = six words
- Third sentence = six words
- Fourth sentence = eight words
- Fifth sentence = nine words
- Sixth sentence = four words
- Seventh sentence = six words
- Eight sentence = four words
- Ninth sentence = five words
- Tenth sentence = two words
- Eleventh sentence = seven words
- Twelfth sentence = three words
- Thirteenth sentence = six words
- Fourteenth sentence = three words
Putting the Cardinal Directions with the number of words then gives you:
- N8
- W6
- N6
- E8
- S9
- E4
- S6
- E4
- N5
- W2
- N7
- E3
- N6
- E3
- 4, 10, 3, 1
- 6, 2, 10, 8
- 4, 2, 7, 10, 11
- 2, 9, 6, 10, 11, 7
These groupings are the number of coins piled along the sides of the parchment from @HSeesAll's original tweet. Turning them into letters using TRIBUTEPEAK as a keyword for a Number to Letter Cipher turns them into:
- 4 10 3 1 = BAIT
- 6 2 10 8 = TRAP
- 4 2 7 10 11 = BREAK
- 2 9 6 10 11 7 = RETAKE
BAIT TRAP BREAK RETAKE, the final code for Puzzle 4.Voyage
For details about the Voyage for Stage 4, see The Hunt for the Hoarder's Golden Key.
Voyage 4: The Hunt for the Hoarder's Golden Key.

Conclusion
The Concluding Letter
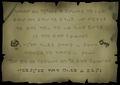
Once the Hoarder's Hunt has ended, "H" sent out one last letter. The letter says that his plan has been foiled, but vows to be back. The identity of "H" on the letter is revealed to be "Hogarth."
H's Concluding Letter is as follows:
The key has turned, the skull revealed in all its golden hues.
Some say I did not want that, but for them I have some news.
This OUTCAST wanted those TWO-FACED Hoarders that you aided
to open that green chest themselves and have their lies paraded
for all to see, the GRUDGE laid bare with greed, the BAIT, to TRAP.
The skull was cursed for Hoarders, wherever on the map.
This Rathbone fake was meant to wound, as his birds had done to me.
Their gold would be removed from flesh – a final ignominy.
But! My rules they BREAK and ask for help. So, the curse is broke.
My shady plan is foiled, and you all now fall within my scope.
I’ll RETAKE the throne that’s vacant now and you will all fall down.
To worship me, just name me as the one who wears that crown...

The Winner Revealed
On July 7th, Sea of Thieves posted a video of who is the Grand Prize winner of the Golden Skull, revealing to be...
Emilie from the UK, aka. @Pythagowalrus.
Gallery
Images

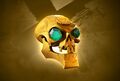
"Defaced Reaper's Mark" icon used across Sea of Thieves social media accounts.
Videos
Source: Sea of Thieves official YouTube channel
Transcript:
(ominous breathing)
Held still for years.
Cold to the touch.
An unjust punishment.
Time without meaning.
They think they understand,
but only I see what they cannot.
Turn the key and all will end for them.
It's yours to reveal...
I will be waiting.
Gallery: