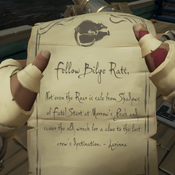
In Pursuit of Prowling, Devilish Shadows of Fate
The In Pursuit of prowling, Devilish Shadows of Fate is the third time-limited Fate of the Damned Voyage of the October 2020 Fate of the Damned Event in Sea of Thieves. The Voyage was made available during the third week of the Event.
This Voyage takes players to The Devil's Roar Region to uncover the fate of the Bilge Rats that had gone missing in the area while on the hunt for Flames of Fate.
Walkthrough
This Voyage acts more like a Tall Tale than a Voyage, taking players from one location to another without clear separate chapters.
The Mysterious Note
After voting for the Voyage at a Voyage Table, the Crew will receive a Mysterious Note from Larinna that can be accessed in their Quest Radial, tasking them with searching for clues inside a shipwreck at Morrow's Peak Outpost.
Morrow's Peak
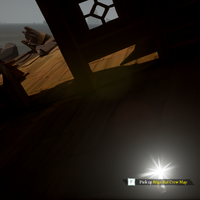
At Morrow's Peak Outpost, players will find the Shipwreck of the Shroudbreaker. In the wreck, they can find a Bilge Rat Crew Map, leading them to the last known location of the missing Bilge Rats.
The Treasure Map will be inside the Captain's Quarters of the Shipwreck and will depict an Island of The Devil's Roar without a red X.
The First Bilge Rat
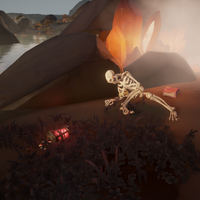
Once players arrive at the designated island, they must look for the missing Bilge Rat Crew member. They will be found as a skeleton near a red-tinted Lantern hidden somewhere on the island.
There will be three things here that can be interacted with:
- Raising a Lantern to the Red Lantern will provide the option to take the Red Flame of Fate.
- A Bilge Rat Crew Map will be found next to the Bilge Rat's skeleton; it will lead to the next quest location. Once the map is taken, 3-4 Red Shadows of Fate will rise to ambush players. Use a Lantern with the Red Flame of Fate, raising it to these Shadows of Fate will make them vulnerable to damage. One of the Skeletons will drop a Skull of the Damned that can be sold to the Order of Souls or Reaper's Bones for Gold and Reputation.
- A Bilge Rat Crew Journal belonging to Bilge Rat Crew member can also be found beside their skeleton. The Journal will detail the Bilge Rat Member's journey to get a Red Flame of Fate:
The Red Lantern Bilge Rat Crew Journal
If I must journal / when I should be killing things / then so shall it be
Simple is my quest / red flame from the Well of Fates / held in lantern high
Volcanoes thunder / and molten rocks soon descend / I spread my arms wide
The killing blow strikes / my head slumps on molten sand / the Ferry awaits
Rosy flame in hand / I step through the fabled door / this journal is done-
-
-
-
The Second Bilge Rat
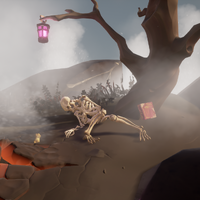
The newly acquired Map will lead to another island to find the next missing Bilge Rat.
This Bilge Rat will have a pink-tinted Lantern with the Pink Flame of Fate nearby, another Bilge Rat Crew Map and Bilge Rat Crew Journal. Picking up the Map will cause Pink Shadows of Fate to ambush this time, again leaving behind one Skull of the Damned upon defeat. Use a Lantern with the Pink Flame of Fate, raising it to the Shadows of Fate to make them vulnerable to damage.
The Bilge Rat's Journal reads as follows:
The Pink Lantern Bilge Rat Crew Journal
"We need a pink flame for those Shadow things," says the Captain. I couldn't believe my luck, not after such a rotten day.
I knew that picking a fight with another pirate, even a fight I had to lose so I could go to the Ferry, would cheer me right up.
Course, I don't want to get us sunk and lose all the other flames, so raising the Reaper's Mark was out. Then I had an idea...
I head to The Reaper's Hideout and wait. Figure sooner or later someone'll arrive, see me sat all alone and use me for target practice.
Who turns up? Only me dear old Pa! Turns out he's a Reaper now. We had a good laugh about it and then he shot me. Cheers, Dad!-
-
-
-
The Boss
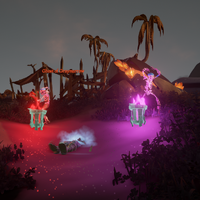
The final Map leads to a Large Island with a red X mark on it. This X won't lead to buried Treasure, but instead to two Skeletons performing a ritual next to red and pink flamed beacons. As the Skeletons are approached, they will summon the Ghost of Graymarrow. Similar to the fight at the Fort of the Damned, the Ghost of Graymarrow will use various Weapons, perform a shockwave attack and occasionally summon Red and Pink Shadows of Fate as backup in an attempt to overwhelm players. Ghost of Graymarrow will have 2000 health during this fight (20 point blank Blunderbuss shots' worth). When he is defeated, he will drop a Ritual Skull and the Voyage will be complete.
Notes
- The island destinations will vary between Voyage instances.
- The Bilge Rat Crew, Journals, and Maps cannot be found without an active Fate of the Damned Voyage.
- The Ghost of Graymarrow will only spawn when the appropriate Map is unlocked, meaning that the Voyage cannot be finished early by sailing to his ritual location.
| ||||||||||||||||||||||||||||||||||||||

