The Search for Wild, Plentiful Shadows of Fate
The Search for Wild, Plentiful Shadows of Fate is the first time-limited Fate of the Damned Voyage of the October 2020 Fate of the Damned Event in Sea of Thieves. The Voyage was made available during the first week of the Event.
This Voyage takes players to the Lagoon of Whispers to meet and help Duke with uncovering the fate of Bilge Rats who had gone missing in The Shores of Plenty and The Wilds while on the hunt for Flames of Fate.
The Voyage
This Voyage acts more like a Tall Tale than a Voyage, taking players from one location to another without clear separate chapters.
The Mysterious Note
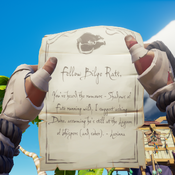
After voting for the Voyage at a Voyage Table, the Crew will receive a Mysterious Note by Larinna that can be accessed in their Quest Radial, tasking them with talking to Duke at Lagoon of Whispers.
Lagoon of Whispers
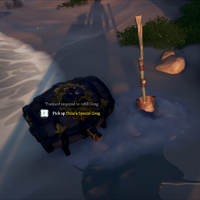
At the Lagoon, players will find Duke standing next to Umbra. He will greet players when approached and task the crew find Duke’s Special Grog buried somewhere on the island.
Duke
Finally! Somebody else has stopped by to see their old mate Duke! You must be missing me when you stop by the tavern, yeah?
Wait... don't tell me. Larinna sent you? Something about Shadow of Fate skellies in the area? Aw... I knew it was too good to be true.
Well, a crew of Bilge Rats did pass by, as it happens, and they had plenty to share. I'll tell you what I know - if you'll have a grog with me!
Not just any old grog, mind you - I'm in the mood for some of my special supply! I just need to remember where I buried it...
Find it for me and I'll tell you everything. There's no use trying to sell it - it's too potent for even the Hoarders to handle. Also, it stinks.
Go on, find my special grog and we'll share a drink for old time's sake. It's buried around here somewhere, near where I left my shovel!-
-
-
-
As he says, Duke's Special Grog can found buried next to a Shovel located at the middle of the Lagoon of Whispers. Digging beside the shovel will uncover Duke's Special Grog. Take the Grog back to Duke. If Duke is spoken to again, he will have the following to say:
Duke
Ah, that's the good stuff! Puts hair on our tongue. You should probably steer clear, though, you looked woozy enough just holding it.
Still, a deal's a deal. See, the other crew that arrived before you did seemed pretty well-prepared by Bilge Rat standards.
They even had an island map, a place Shadows of Fate have been spotted. I'm certain that's where they were heading next.
Duke's special grog may have made them a bit absent-minded, though, because they left their map behind! Here, you can take it.
My sailing days are over, it seems, so the map's no use to me. But, uh, don't be a stranger! I'll be here. I'm always here...-
-
-
-
In return for his Special Grog, Duke will provide a Treasure Map of an island with no X marks. This is the last known location of the missing Bilge Rats that must be visited to progress the quest. The Maps will lead to an island in the The Wilds or The Shores of Plenty.
The First Bilge Rat
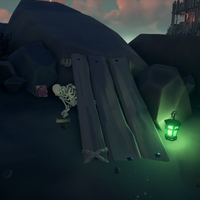
Once players arrive at the island, they must find the missing Bilge Rat Crew member. They will be found as a skeleton near a green-tinted Lantern hidden somewhere on the island.
There will be three things here that can be interacted with:
- Raising a Lantern to the Green Lantern will provide the option to take the Green Flame of Fate.
- A Bilge Rat Crew Map will be found in the Bilge Rat's skeleton hand; it will lead to the next quest destination. Once the map is taken, 3-4 Green Shadows of Fate will rise to ambush players. Use a Lantern with the Green Flame of Fate, raising it to these Shadows of Fate will make them vulnerable to damage. One of the Skeletons will drop a Skull of the Damned that can be sold to the Order of Souls or Reaper's Bones for Gold and Reputation.
- A Bilge Rat Crew Journal belonging to the Bilge Rat Crew member can also be found beside their skeleton. The Journal will detail the Bilge Rat Member's journey to get a Green Flame of Fate:
The Green Lantern Bilge Rat Crew Journal
Larinna asked us to write everything down, so this is me. Writing everything down. Hooray!
I know Duke could be impulsive but at least he knew how to have a good time. We are Bilge Rats after all!
My job is to collect a green flame from the Ferry of the Damned, which is easy enough, if a little humiliating.
I've slaughetered so many skellies over the years, the idea of letting one of them do me in, it's... well, a little embarrassing, frankly.
Once I'm dead, I'll scoop up my flame from the Well of Fates and return to take my revenge on whichever bone-bag killed me. HAH!-
-
-
-
The Second Bilge Rat
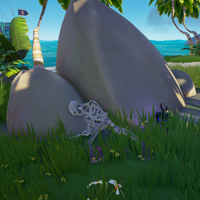
The newly acquired Map will lead to another island to find the next missing Bilge Rat.
This Bilge Rat will have a purple-tinted Lantern with the Purple Flame of Fate nearby, another Bilge Rat Crew Map, and a Bilge Rat Crew Journal. Picking up the Map will cause Purple Shadows of Fate to ambush this time, again leaving behind one Skull of the Damned upon defeat. Use a Lantern with the Purple Flame of Fate, raising it to the Shadows of Fate to make them vulnerable to damage.
The second Bilge Rat's Journal reads as follows:
The Purple Lantern Bilge Rat Crew Journal
Ship's Log, Day 10. Setting sail on new Voyage. Special assignment from Bilge Rat Leader L. Top secret, v. big opportunity.
Crew in high spirits. Expecting a good fight. Will make camp later for supplies / to align strategy. Legend-tier teamwork!
Update #1: Forgot pig cages. Bananas for dinner. Now assigning crew to collect special flames from Ferry. L will be impressed.
Update #2: NO NO NO NOT FAIR WHY DO I HAVE TO DO PURPLE I DON'T WANT TO BE POISONED I HATE SNAKES SO MUUUCH!!
my crew hates me-
-
-
-
The Boss
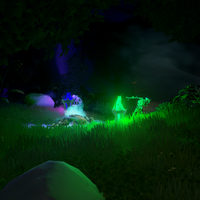
The final Map leads to a Large Island with a red X mark on it. This X won't lead to buried Treasure, but instead to two Skeletons performing a ritual next to green and purple flamed fire pits. As the Skeletons are approached, they will summon the Ghost of Graymarrow. Similar to the fight at the Fort of the Damned, the Ghost of Graymarrow will use various Weapons, perform a shockwave attack and occasionally summon Purple and Green Shadows of Fate as backup in an attempt to overwhelm players. Ghost of Graymarrow will have 2000 health during this fight (20 point blank Blunderbuss shots' worth). When he is defeated, he will drop a Ritual Skull and the Voyage will be complete.
Notes
- The island destinations will vary between Voyage instances.
- The Bilge Rat Crew, Journals, and Maps can not be found without an active Fate of the Damned Voyage.
- The Ghost of Graymarrow will only spawn when the appropriate Map is unlocked, meaning that the Voyage cannot be finished early by immediately sailing to his ritual location.
| ||||||||||||||||||||||||||||||||||||||

