The Hunt for Hidden, Ancient Shadows of Fate
The Hunt for Hidden, Ancient Shadows of Fate is the second time-limited Fate of the Damned Voyage of the October 2020 Fate of the Damned Event in Sea of Thieves. The Voyage was made available during the second week of the Event.
This Voyage takes players to the Stephen's Spoils Seapost to meet and help Merrick with uncovering the fate of Bilge Rats who had gone missing in The Ancient Isles while on the hunt for Flames of Fate.
Walkthrough
This Voyage acts more like a Tall Tale than a Voyage, taking players from one location to another without clear separate chapters.
The Mysterious Note
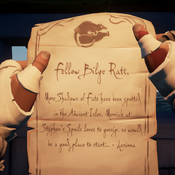
After voting for the Voyage at a Voyage Table, the Crew will receive a Mysterious Note from Larinna that can be accessed in their Quest Radial, tasking them with talking to Merrick at Stephen's Spoils.
Stephen's Spoils
At Stephen's Spoils, players will find Merrick on the dock. He will ask for assistance in retrieving his father's boot, Old Stompy, that was knocked in the sea by a clumsy Bilge Rat.
Merrick
Oh-ho! I recognise that steely glint in your eye. You're here on business, ain'tcha? Asking about them fancy skellies in these parts!
Well, I ain't got time to chat. As they were leaving, some clumsy oafs went and knocked my priceless family heirloom into the sea!
An' not just any heirloom - Old Stompy, my Dad's prize-winning boot! He was a shoemaker, y'see. An' those louts treated it like junk!
I ain't so good at diving these days. Too buoyant! If you can find my beloved boot an' bring it back safely, I'll help you any way I can.-
-
-
-
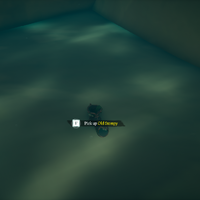
The boot can be found on the rocks below the Seapost. Pick it up and return it to Merrick.
Merrick
That's it! Old Stompy, home safe and sound! Dad was head of the Shoemaker Society, you know. What a load of old Cobblers they were!
Now, those clumsy oafs were asking about the same skellies as you. In a real hurry, they were. Didn't even stop for lunch!
I overheard 'em talking about an island they wanted to check, and marked this old map so I wouldn't forget. Here...
If you'd rather not find them skellies, you could always stay here and catch me a fish or two. I need to make a start on dinner!-
-
-
-
In return for Old Stompy, Merrick will provide a Treasure Map of an island with no X marks. This is the last known location of the missing Bilge Rats that must be visited to progress the quest. The Map will lead to an island in The Ancient Isles.
The First Bilge Rat
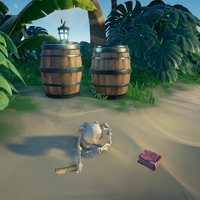
Once players arrive at the designated island, they must look for the missing Bilge Rat Crew member. They will be found as a skeleton near a white-tinted Lantern hidden somewhere on the island.
There will be three things here that can be interacted with:
- Raising a Lantern to the White Lantern will provide the option to take the White Flame of Fate.
- A Bilge Rat Crew Map will be found in the Bilge Rat's skeleton hand; it will lead to the next quest location. Once the map is taken, 3-4 White Shadows of Fate will rise to ambush players. Use a Lantern with the White Flame of Fate, raising it to these Shadows of Fate will make them vulnerable to damage. One of the Skeletons will drop a Skull of the Damned that can be sold to the Order of Souls or Reaper's Bones for Gold and Reputation.
- A Bilge Rat Crew Journal belonging to Bilge Rat Crew member can also be found beside their skeleton. The Journal will detail the Bilge Rat Member's journey to get a White Flame of Fate:
The White Lantern Bilge Rat Crew Journal
Our Quarry may be out in the Shores of Plenty, but the storm on the horizon didn't care.
Rather than change heading, my lovely crew packed me off in a rowboat and left me all alone on the waves!
By the time I caught up to the storm, I was glad of the rain. For one thing, it washed the sweat away.
I abandoned my mighty vessel on the beach and trekked to the peak of Devil's Ridge, cutlass in hand and striking a pose.
Not my most dignified moment, but whatever. Down came the lightning, and I returned from the Ferry with the white flame we need.-
-
-
-
The Second Bilge Rat
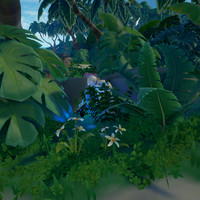
The newly acquired Map will lead to another island to find the next missing Bilge Rat.
This Bilge Rat will have a blue-tinted Lantern with the Blue Flame of Fate nearby, another Bilge Rat Crew Map and Bilge Rat Crew Journal. Picking up the Map will cause Blue Shadows of Fate to ambush this time, again leaving behind one Skull of the Damned upon defeat. Use a Lantern with the Blue Flame of Fate, raising it to the Shadows of Fate to make them vulnerable to damage.
The Bilge Rat's Journal reads as follows:
The Blue Lantern Bilge Rat Crew Journal
After arguing all night, we drew lots. Guess who picked the short straw? Me, that's who!
I hate sharks. Their cold dead eyes. Their skin. How quiet they are. And I had to serve myself up to one as a snack!
Two hours I sat in the freezing water, and not one single fin did I spy. The others were no help. Kept joking about marinade...
I must've dozed off floating there, because next thing I knew... CHOMP! Talk about a rude awakening, 'cept I woke on the Ferry.
Still, now I've a bright blue flame in my lantern. That'll show those Shadow skellies how serious we are about taking 'em down!-
-
-
-
The Boss
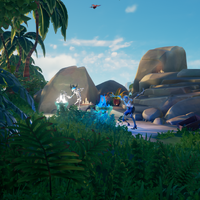
The final Map leads to a Large Island with a red X mark on it. This X won't lead buried Treasure, but instead to two Skeletons performing a ritual next to white and blue flamed fire pits. As the Skeletons are approached, they will summon the Ghost of Graymarrow. Similar to the fight at the Fort of the Damned, the Ghost of Graymarrow will use various Weapons, perform a shockwave attack and occasionally summon White and Blue Shadows of Fate as backup in an attempt to overwhelm players. Ghost of Graymarrow will have 2000 health during this fight (20 point blank Blunderbuss shots' worth). When he is defeated, he will drop a Ritual Skull and the Voyage will be complete.
Notes
- The island destinations will vary between Voyage instances.
- The Bilge Rat Crew, Journals, and Maps cannot be found without an active Fate of the Damned Voyage.
- The Ghost of Graymarrow will only spawn when the appropriate Map is unlocked, meaning that the Voyage cannot be finished early by sailing to his ritual location.
| ||||||||||||||||||||||||||||||||||||||

